
The undesirable metal vent hood ruins the visual appeals of a kitchen with its commercial look. It breaks the design circulation and continuity of cabinets and walls with its messy look. But what can you do? Standard variety hoods are currently pricey enough, and purchasing a cover to hide them is a lot more demanding. We say construct a DIY range hood cover yourself. A custom-built variety hood cover fulfills all of your style requirements while improving the performance of the metal vent hood, and you can keep it well within your budget plan.
The self-built range hood cover provides a tailored touch to the design and design of your cooking area. Its design versatility and endless methods of customization are among the reasons developing one yourself is way better than purchasing. If you are a do it yourself lover trying to find an engaging weekend task, we have you covered.
Kaylee, from The Simple Cozy Sanctuary, has actually attempted this weekend job for her home, and the outcomes are nothing short of amazing. Let’s dive into the tutorial on how to construct a DIY range hood cover yourself.
Likewise Read: How to Make Firewood Rack Without any Tools or Advanced Abilities
Products You’ll Require for the DIY Range Hood Cover
- Miter Saw
- Track Saw
- Drill
- Parallel clamps
- Framing square
- Half-inches plywood
- Brad nails
- Wood glue
- Joint compound
- Caulk
- Guide
- Roman clay
- Three-inch wood screws
How to Build Range Hood Cover
Procedure Vent Hood
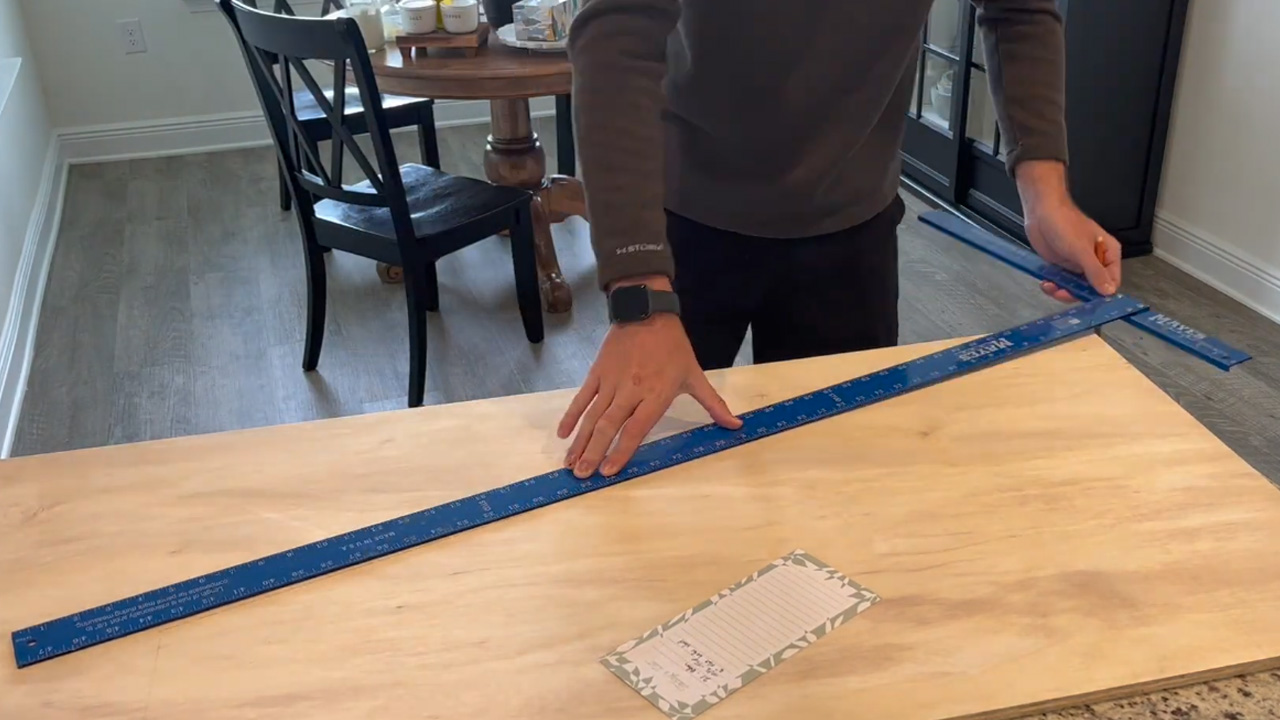
Image: The Basic Cozy Haven Do not miss this crucial step. Start by measuring the height, width, and depth of the vent hood correctly. This action helps figure out the exact dimensions of your variety hood cover and how much plywood you’ll require
. Now draw the side shape, consisting of two side panels and a front panel on plywood using a pencil, speed square, and a straight edge. Cut the Panels Image: The Simple Cozy Haven After you are done with detailing, clamp the two plywood boards and cut them together. It keeps the shape identical and saves time. Cut a front panel as well, which will form the front face of the range hood cover.
Assemble Hood Cover Frame
 < img width=" 1280"height=" 720"src ="// www.w3.org/2000/svg%22%20viewBox=%220%200%201280%20720%22%3E%3C/svg%3E" data-src= "https://cdn.homecrux.com/wp-content/uploads/2026/03/DIY-range-hood-cover-3.jpg" alt ="Assemble the hood cover frame and glue it together"/ >
Image: The Simple Cozy Haven Start assembling the cut plywood boards together and apply wood glue to join them together. Use brad nails to secure the wooden structure. To cover the front face totally, cut additional plywood panels and join them to the wooden structure utilizing the exact same treatment. Smooth and Sand the Surface Image: The Easy Cozy Haven Once your wood structure is prepared, you’ll discover the nail holes, plywood edges, joints, and gaps. Use joint substance to fill the nail holes, plywood edges, and apply caulk to the seams and gaps. After the filler dries, sand the whole structure to smooth it
throughout. Apply Primer and Roman Clay End Up
 Image: The Easy Cozy Haven After sanding, apply an even coat of primer on
the entire wooden structure. Bring a putty knife and spread Roman clay on the variety hood cover. Ensure to use 2 coats to get a plaster-like smooth finish. Connect White Oak Trims and Install Image: The Basic Cozy Haven
The white oak trims will make your variety hood cover stick out and provide it a high-end designer appearance. Connect the trims using wood glue and protect them with brad nails. Now, carefully lift the hood cover and slide it over the existing vent hood. Securely attach it by screwing the hood cover into two by 4 wall frame and filling the nail holes with filler. Clean up the kitchen area and enjoy your self-built designer range hood cover.
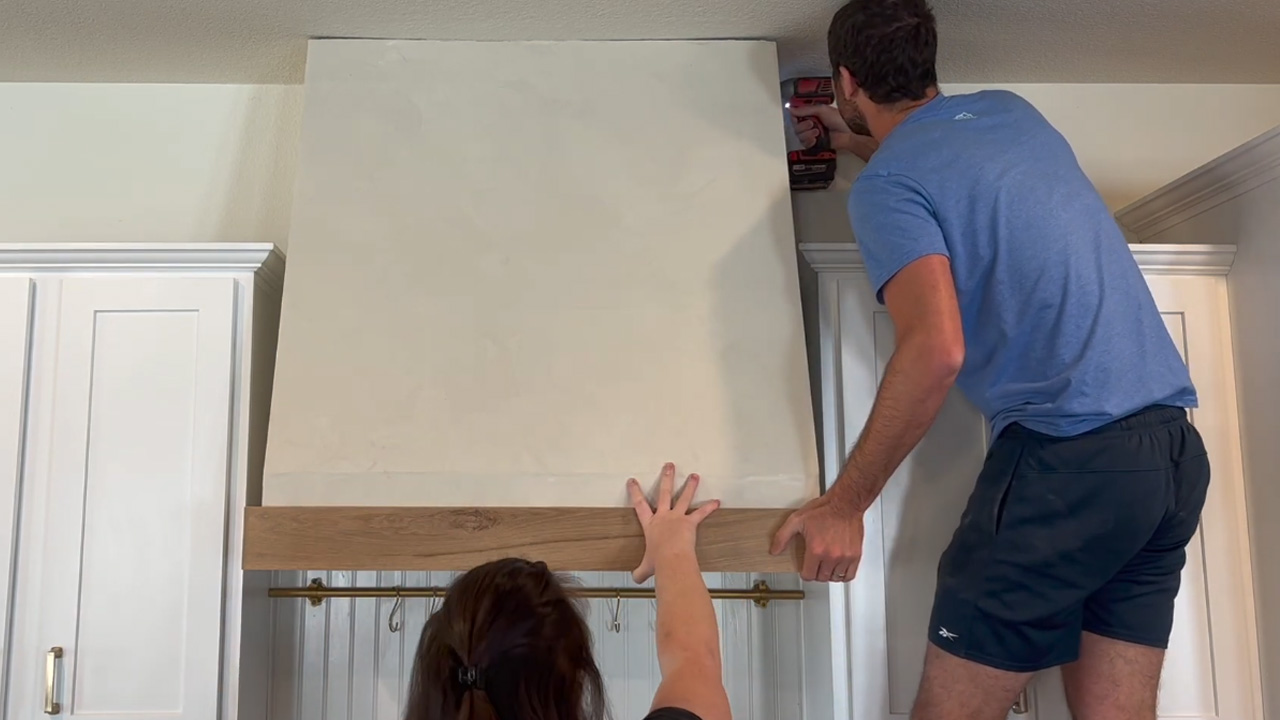
Image: The Basic Cozy Haven Final Word It just takes just $ 150 to develop the do it yourself variety hood cover. The entire procedure is fairly simple and takes just a day or 2 to complete. You can complete this project on your weekend using the tools and procedure discussed above. You can do the entire project by yourself, however you might require assistance throughout setup.
Personalize your self-built variety hood cover however you want to fit your kitchen area visual appeals. The cover will improve the style and design of your kitchen while offering functional benefits too.